EazyDraw Raw App For Help Drawing Presentation EazyDraw Raw App For Help

EazyDraw Page Layout Presentation
Related Information
Page Setup
Rulers
Attribute Toolbar
Ruler Style
Page Stamp
Page Layout
|

This area of the panel shows a schematic of the layout of the complete drawing. The parameters provided here determine several aspects of the appearance of the drawing in the macOS window including parameters for controlling the presentation of rulers and the numbering of pages.

One reason we find here parameters such as the rulers checkbox and the Attributes bar, is to provide a method to set a default drawing window appearance. One can use the simple Current and Default button mechanism to easily set a preferred arrangement of drawing window elements for new drawings.

The layout schematic view depicts each page as a gray rectangle. The aspect ratio of the page representation is true to page shape which is determined by setting on the Page Setup parameter panel. The primary parameter effecting the page shape is the "Orientation" selection. As you change the number of pages down or across the effects are shown in this window.

There are two ways to number the pages, "across then down" or "down then across". The check box found in the top-right of the panel determines the numbering method. Page numbering effects Page Stamps which are special text boxes that may be placed anywhere on the drawing. The numbering order also effects the order in which pages are printed.

A checkbox for controlling the presentation of Rulers is found just below the Layout Schematic. Rulers may be shown along the Left and Top of a drawing. If the "Display Rulers" check-box is checked rulers are shown on display windows. You may also control this parameter with the menu command "Show/Hide Rulers" found near the bottom of the Tools main menu.

A checkbox for controlling the inclusion of Attributes mini toolbar is also found below the Layout Schematic. This is a contextual mini-toolbar that provides convenient access to commonly used functions, based on which graphics are selected or not selected on the drawing. You may also control this parameter with the menu command "Show/Hide Attributes" found near the bottom of the Tools main menu.

The Canvas section is used to add a border region to the on-screen drawing window. This canvas margin region is a ghost like area around the active drawing, graphics may be placed or drawn in this region, but the region only exists on screen, it does not print. Artist and graphic designers working on page layout projects like to use this area as an active scratch pad. But it can be confusing for if one is not familiar with this arrangement.

The Canvas margin is defined by a single width which defines the uniform border region around the active drawing area, the Margin value. This is entered in the parameter palette units, not drawing units: see Palette Buttons for more information. Two Color Wells are provided to set a border color for the active drawing region and a background color for the "off drawing" active border region.

The Canvas border region does not have pages defined, it will not print. Graphics need to move to the active area of the drawing to print.

EazyDraw Page Stamp Example

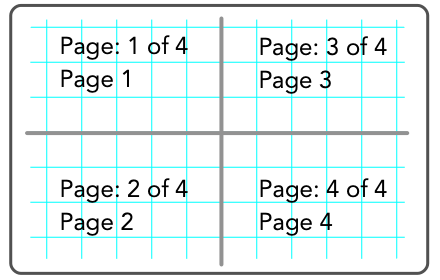
A Page Stamp is a text box with a page number like those shown in the example to the right. The actual page number shown is automatically updated to reflect the Page Stamp’s page number and the total number of pages in the document. This Page Stamp is dynamic, when "Pages Across" or "Pages Down" are changed, all of the document’s page stamps will change appropriately.

The color of the schematic-pages is always gray. These page icons cannot be used to rearrange the layout of the drawing, you need to use the EazyDraw window (zoom it way out and show page breaks) to do that.

There is a second way to arrange a drawing window in the "Canvas" manner, with a border region around the drawing. This would apply if it is necessary to a) have a distinct border region and b) be able to print the border region. Leave the Border margin at 0, add additional pages across and down to form a border of active pages, but limit the drawing activity to the central pages of the layout. For example for a single page layout, use 3 across and 3 down pages but only draw on the center page and use the other pages as off-project border area. Then to print the project do not print 9 pages, just print the single center page. To set an off-project border color, add a layer below the other drawing layers and use two concentric rectangles to provide a border background color and margin border as desired.